This post details how I fitted a Witter towbar to my Mitsubishi Outlander PHEV MY2019.
In recent years the price of towbars and installation has risen to eye-watering levels. I might have paid £450 for an installed towbar but £800? No chance. I read plenty of articles and watched a few YouTube videos and decided it was something well within my capabilities.
The Outlander Towbar and Electronics
The towbar i decided to purchase was the Witter Detachable Swan Neck. It was more expensive than a fixed towbar but I just liked the idea of being able to remove the neck and return the car to it’s original form.
From comments on various forums it was clear that buying a vehicle specific wiring kit was well worth the extra price over a generic kit. The vehicle specific kit is almost plug-n-play and doesn’t require any of the car’s wiring loom to be cut. Once you see how well wrapped up the Outlander’s wiring is there is no way you’ll want to try hacking it up to connect up a generic kit. Get the vehicle specific kit.
I opted for a 7-pin socket as I only ever want to tow a small trailer. This reduced the price and made the installation slightly easier. If a future owner needs a 13-pin socket in the future they can swap the wiring kit as required.
The Outlander towbar and vehicle specific electrical kit was purchased from the PF Jones website.
Tools
Here are the tools I used.
- Socket set (sockets, wrench, extension bar)
- Torque wrench
- Spanners
- Flat head screwdrivers
- Pliers
- Crimpers
- Soldering iron/solder
- Knife for opening packaging
- Tea, coffee, biscuits
- (optional) beer for post installation celebrations
Task Sequencing
The removal of the boot interior trim worried me more than removing the bumper so I did the boot area electrics first. Once I had the wiring fed through to the underside of the car I fitted the metal work. In this article I’m going to describe the Outlander towbar fitting first as i think it will make more initial sense to anyone coming across this post while doing their own research.
Preparation
in order to make the most of your time it is worth doing some preparation before starting.
- Print out any instructions you need for your towbar
- Charge your phone so you can take photos as you go for future reference
- Grab a laptop in case you need to take a break and refer to any YouTube videos or Facebook posts
- Gather all the tools you might need
- Put something on the ground around the boot area
- Decide where you are going to put the bumper after you’ve removed it
- Have some pots or bowls available to put any bolts or fasteners you remove so you don’t loose them
- Post-it notes or sticky labels are really useful to make sure you put everything back in the correct place
Differences Between the PHEV and ICE Models
The Outlander PHEV has a number of differences to the Petrol/Diesel version. In the most part these make a towbar installation easier.
- The 12V battery is in the boot so all the electrical work is within a few feet of the towbar.
- The exhaust doesn’t get in the way so doesn’t require any modifications.
but …
- The 12V battery sits in a protruding tray which mildly interferes with the installation.
- The 12V battery makes it tricky to peel back the interior trim panel.
Rear Bumper Removal
The rear bumper is held in place by 8 bolts to the rear, a number of plastic fasteners along the underside edge and 2 push-n-click sections on the side.
I removed:
- 4 bolts holding the 2 rubber buffers
- 4 bolts holding the bumper to the chassis
- 6 plastic fasteners in the wheel arches
- 8 plastic fasteners along the underside edge
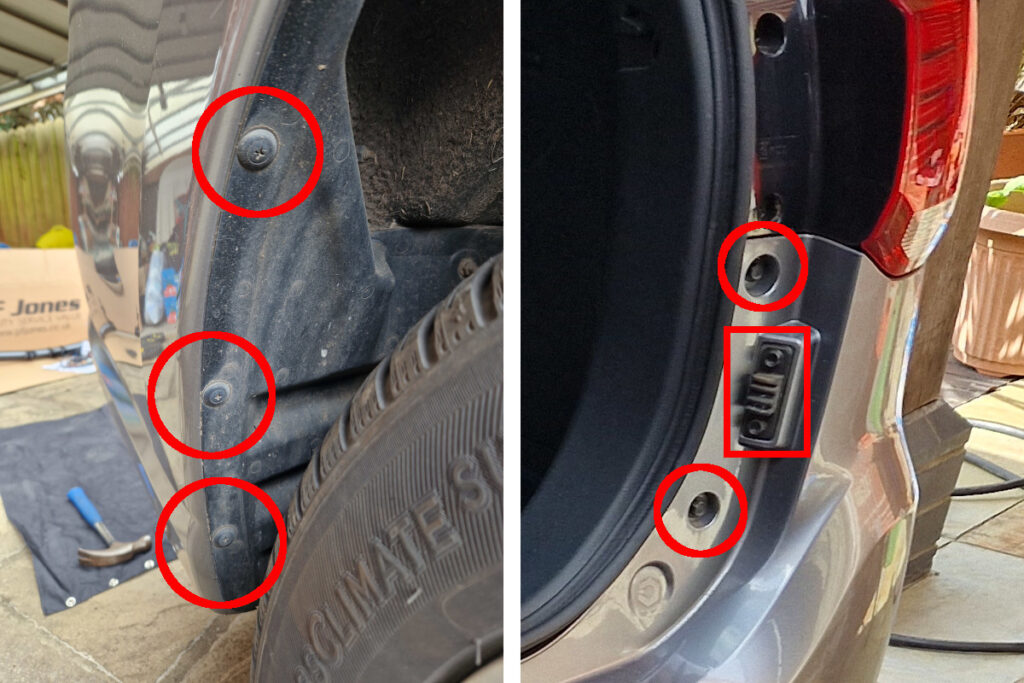
Once the 8 bolts and all the plastic fasteners are removed the bumper can be pulled off. The side sections need to be pulled outwards and they will unclip. The side clips are in the area shown in the photo below:
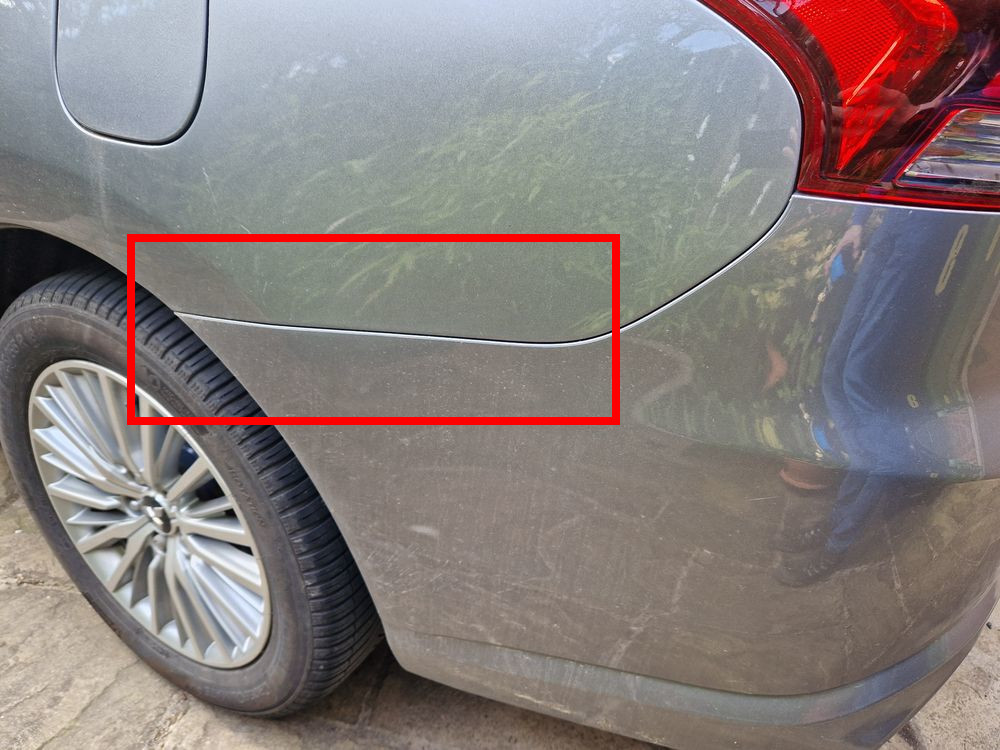
There is a slight lip under the rear light clusters but I found I didn’t need to remove those to remove the bumper. Some instructions/videos do remove them and it might make it slightly easier to refit the bumper.
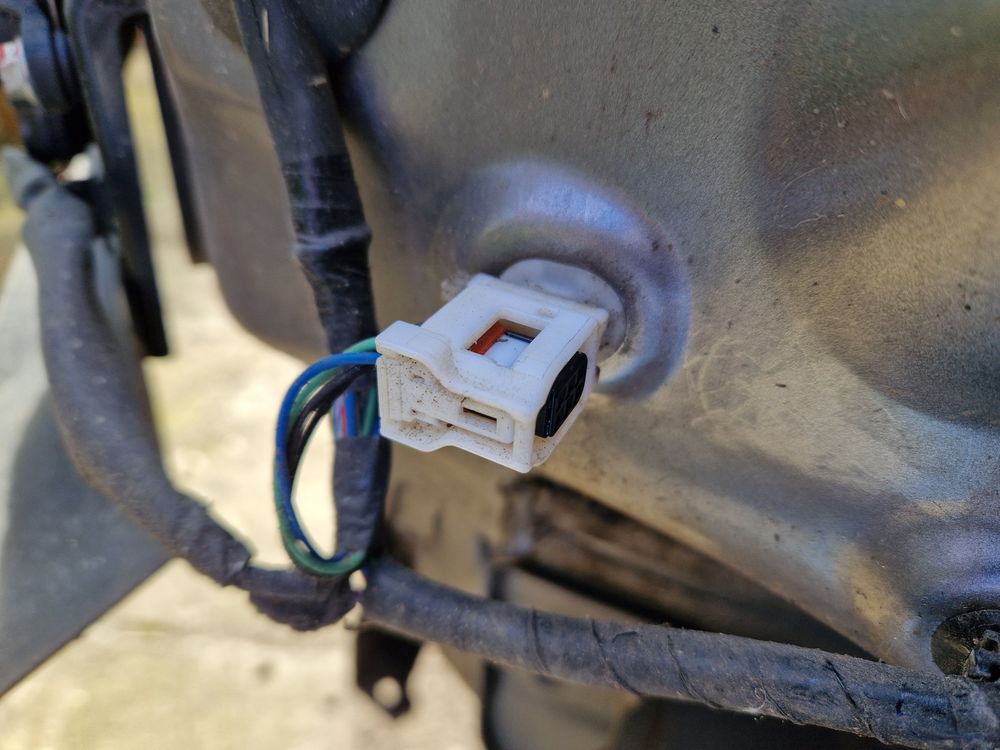
NOTE: as you remove the bumper you will need to unplug any wiring from the car to the lights and/or parking sensors. It helps if you have someone to hold the bumper while you unclip any connectors. You may need a small flat-head screwdriver to undo any clips.
Here is the lighting cable connector that needed to be unplugged before the bumper could be removed completely.
Rear Crash-bar Removal
With the bumper removed you will be faced with the factory fitted crash-bar. In the photo below you can see the crash bar. The “rear cross traffic” sensors can be seen in the corners. They don’t affect the installation but you should probably avoid hitting them with anything.
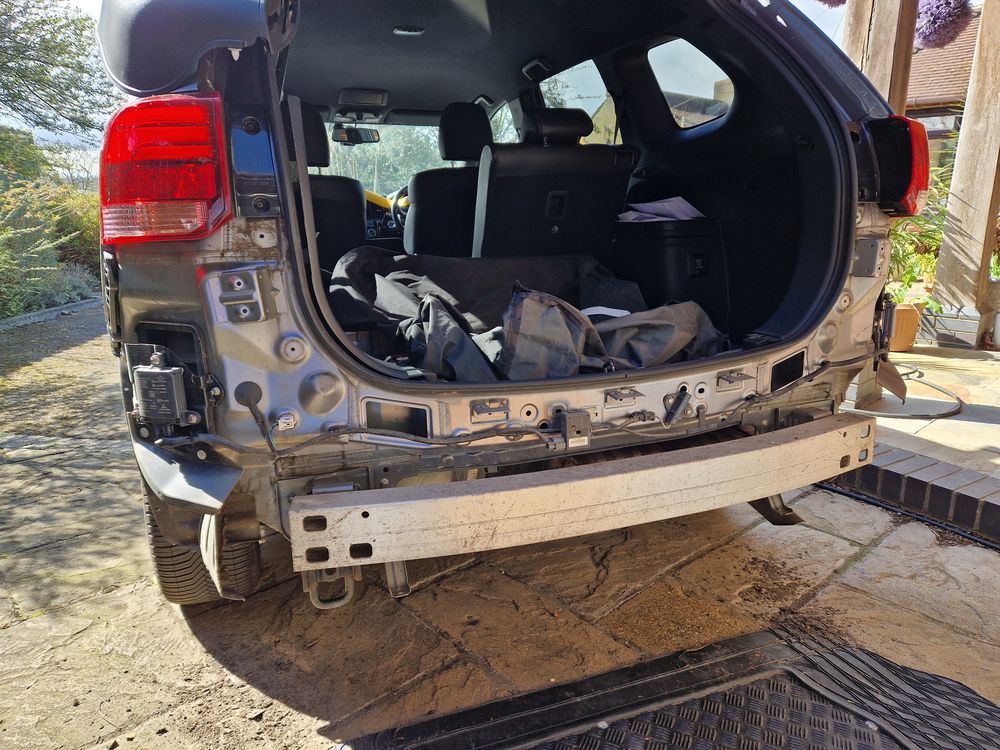
The crash-bar has to be removed and this is easily done with a socket and ratchet handle. There are 6 bolts to remove and you may require an extension bar for your wrench.
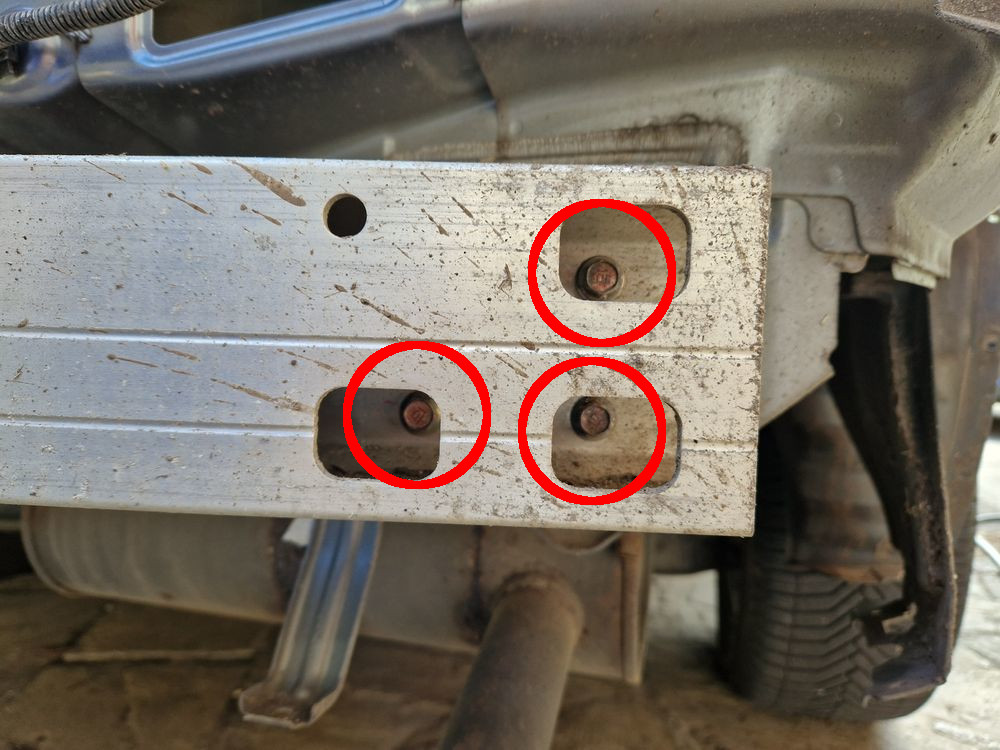
The crash bar itself isn’t very heavy but just make sure you support it when removing the last bolt. The crash-bar does not need to be re-attached for the Witter towbar. The towbar becomes your new crash-bar. This may vary for other brands so check the instructions carefully.
Rear Crash-bar Mounts Removal
Once the crash-bar has been removed the two mounts need to be unbolted.
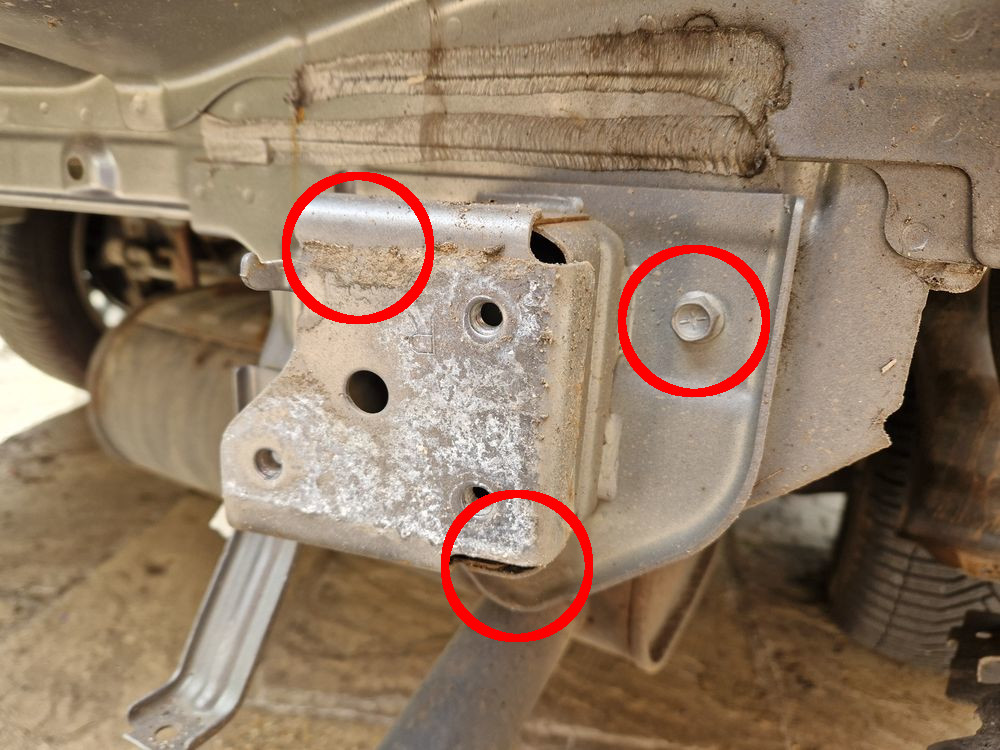
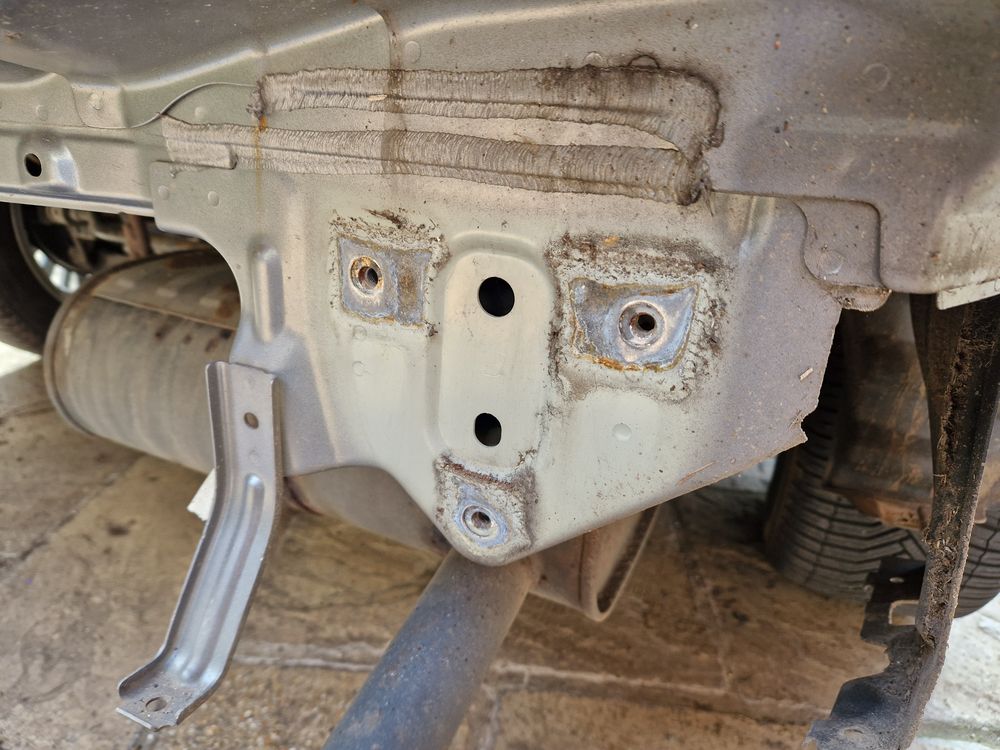
There are 3 bolts per mount so 6 in total. You should end up with a flat area with 3 threaded holes.
Towing-Eye Removal
The towing eye metal-work gets in the way of progressing with the installation so must be removed. This wasn’t mentioned in the instructions that came with the towbar so was a nice little surprise.
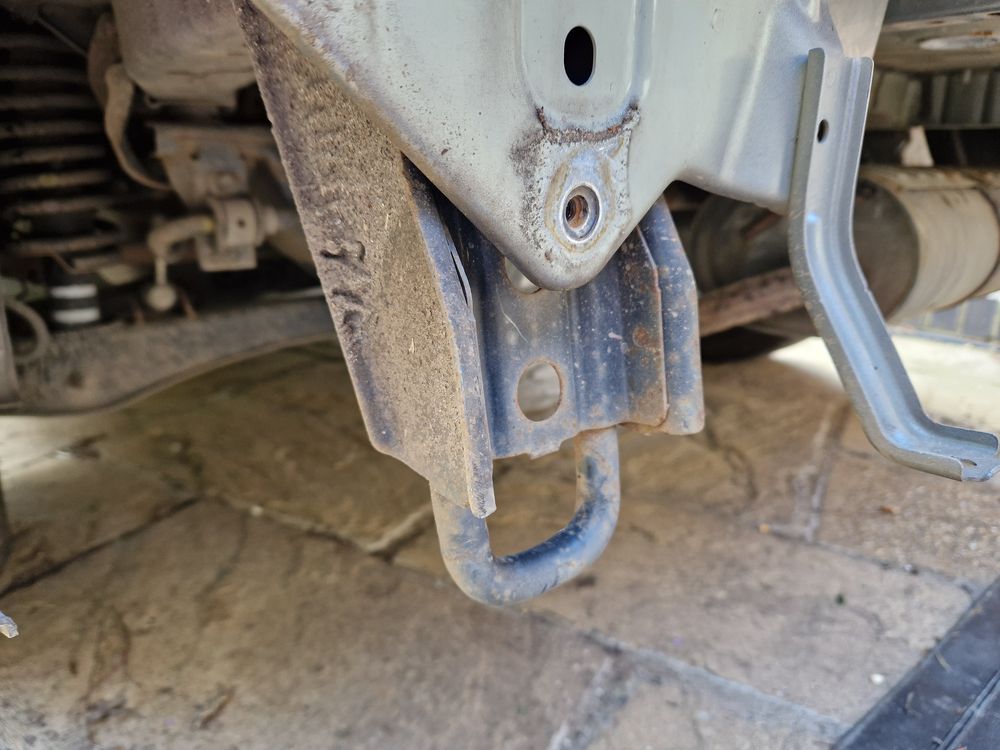
This is straightforward with spanners and/or sockets. There are 3 bolts to remove.
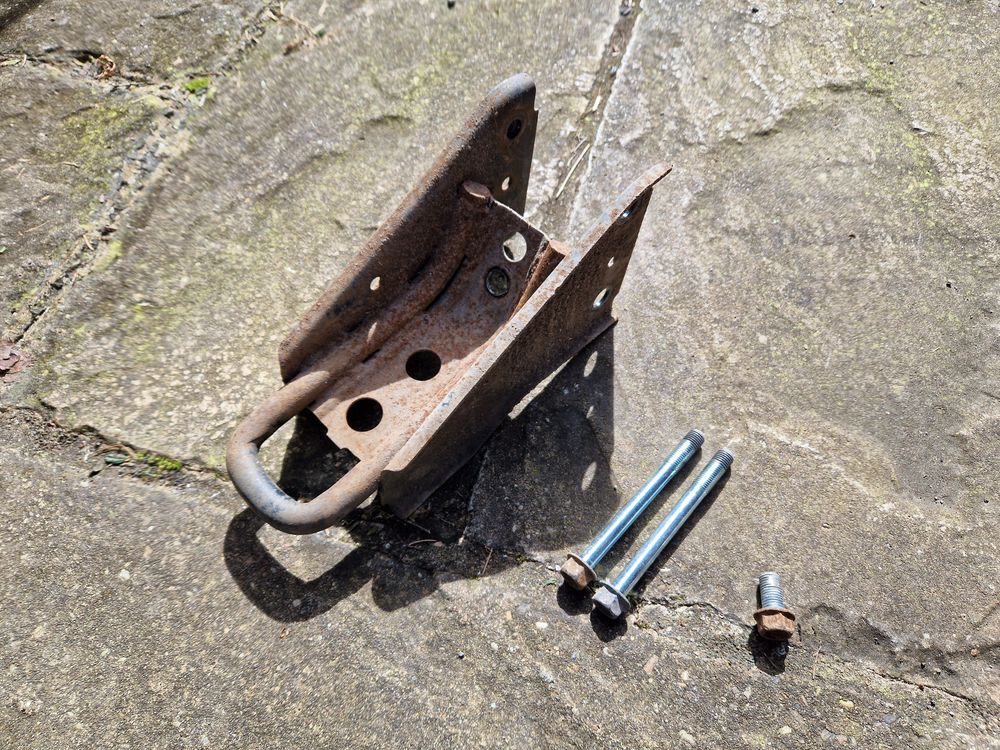
The towing-eye is not re-fitted as the new towbar can be used instead.
Towbar Frame Fitting
Now the main towbar metalwork can be fitted. For anyone who grew up with Meccano this bit should be easy.
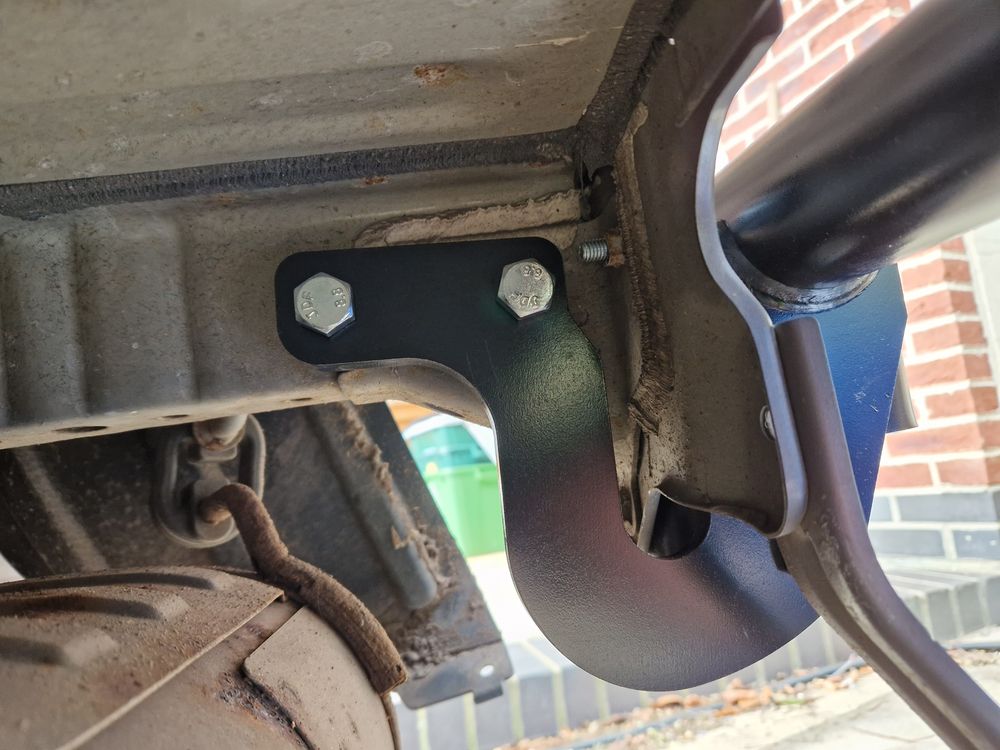
The Witter towbar requires two brackets to be attached to the main crossbar. These attach to the 2×3 bolt holes in the car body. At this point I didn’t tighten up the bolts fully.
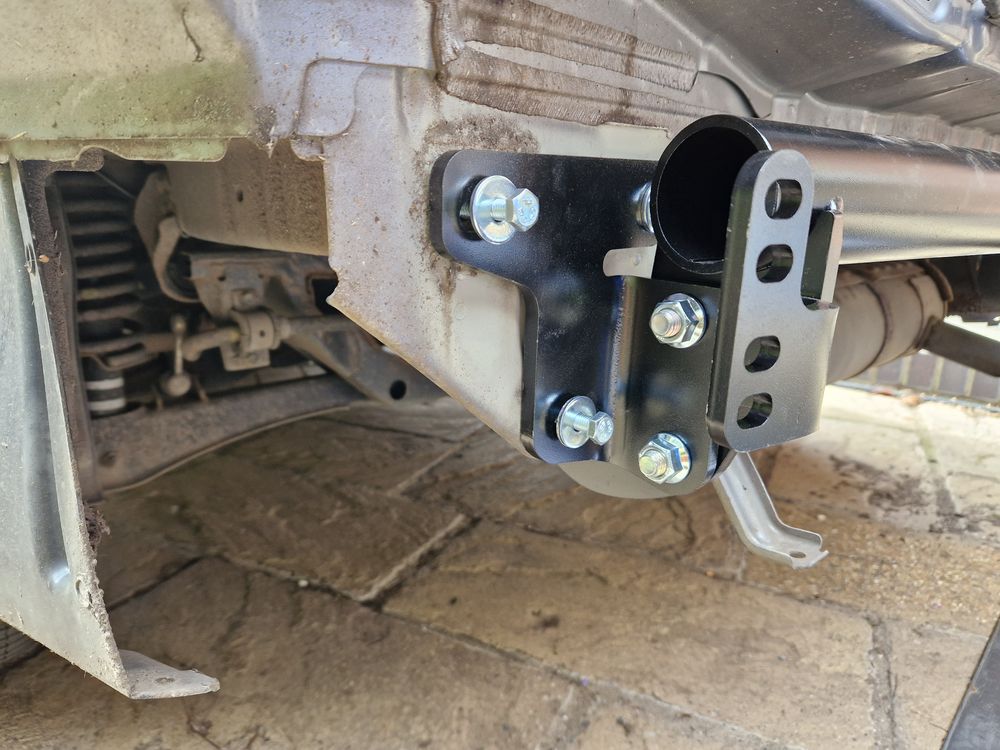
On each side there are 2 cylindrical holes that accept bolts. On the left side, the battery tray limits the space so the bolts have to be inserted from the outer side with the nuts fitting in the gap.
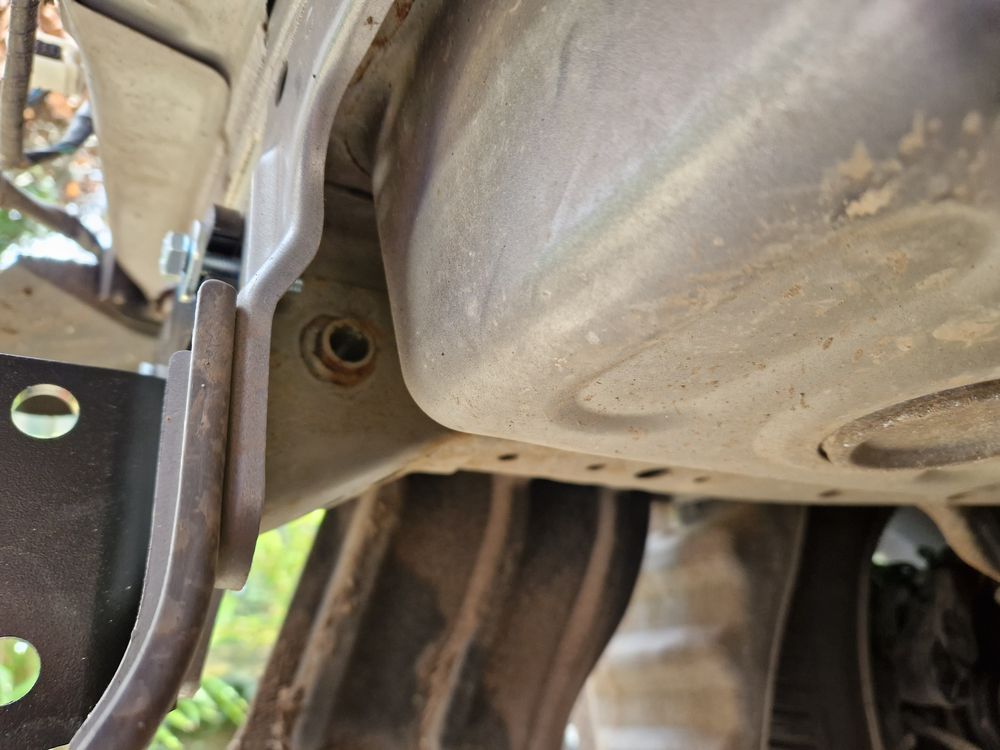
This can be seen in the photo below:
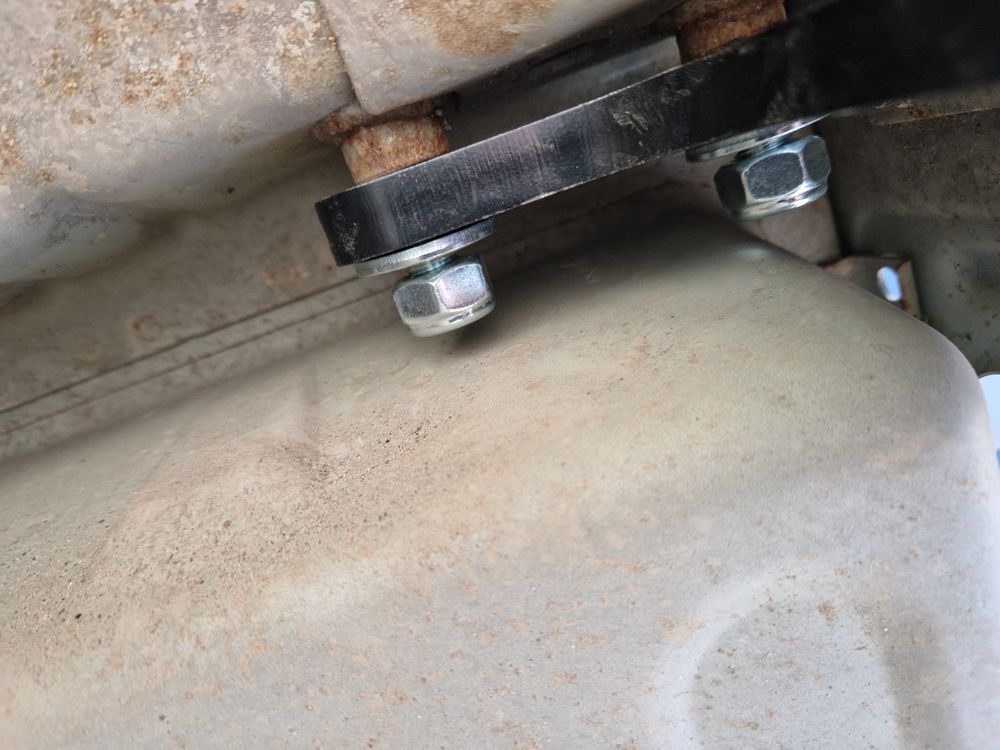
Over on the right-hand side there is loads of room so the bolts can be fed through in either direction. In the photo below you can see the exhaust in the bottom left-hand corner. It’s no-where near the towbar but I believe this isn’t the case on the ICE version of the Outlander.
Finally below you can see the towbar fitted. There are 3+2+2+3 bolts in contact with the car.
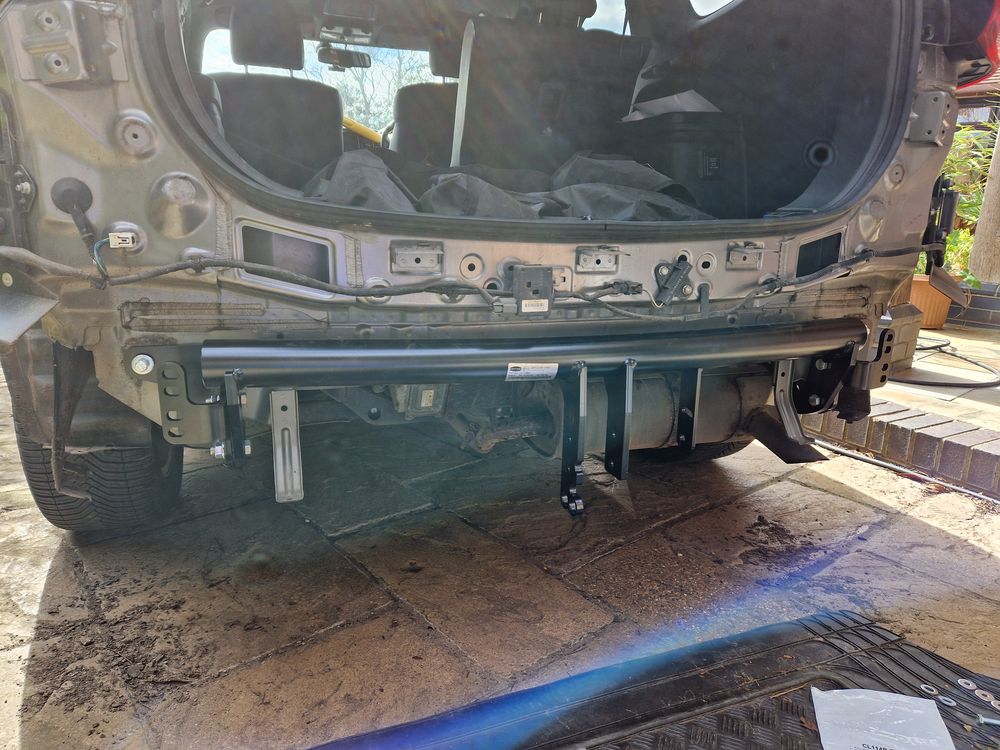
At this point I tightened up all the bolts with a torque wrench using the torque settings stated in the fitting instructions.
Make sure you tighten all bolts before you re-fit the bumper!
Swan Neck Fitting
With the towbar fitted it was time to attach the swan neck. A receptor block has to be bolted in-between the vertical plates. This receptor block will receive the swan neck.
The Witter swan neck needs to be “primed” before it will lock into position. This involves getting the sprung locking pin in the correct position. This is best explained by this PF Jones video:
Once it is primed you can insert it into the receptor block, the locking pin will engage and it is attached.
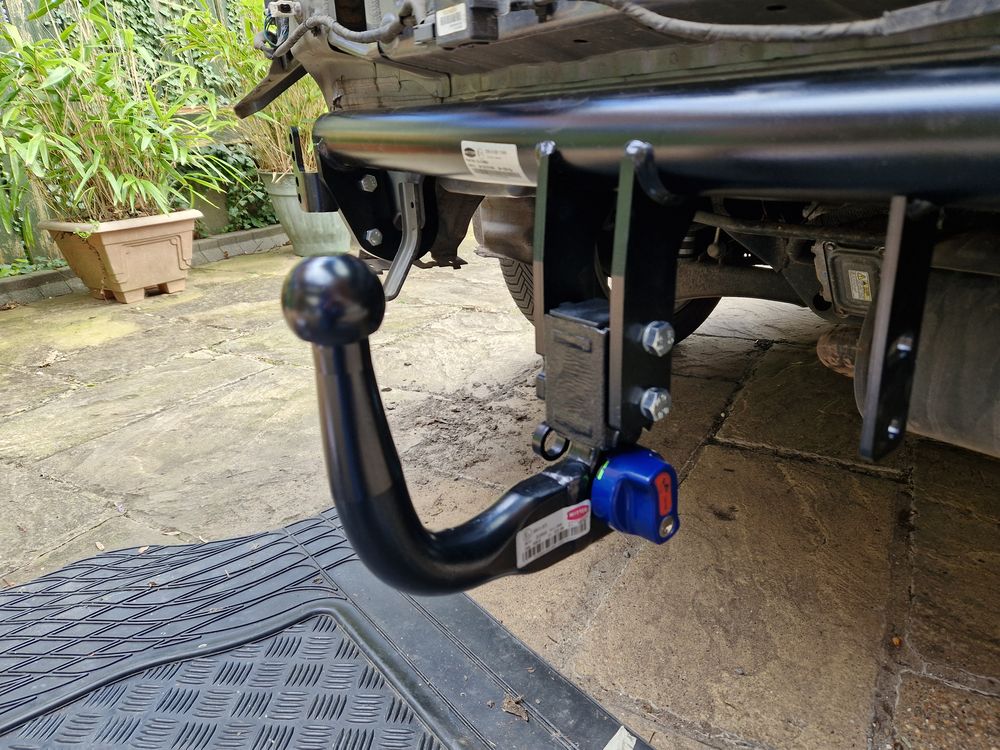
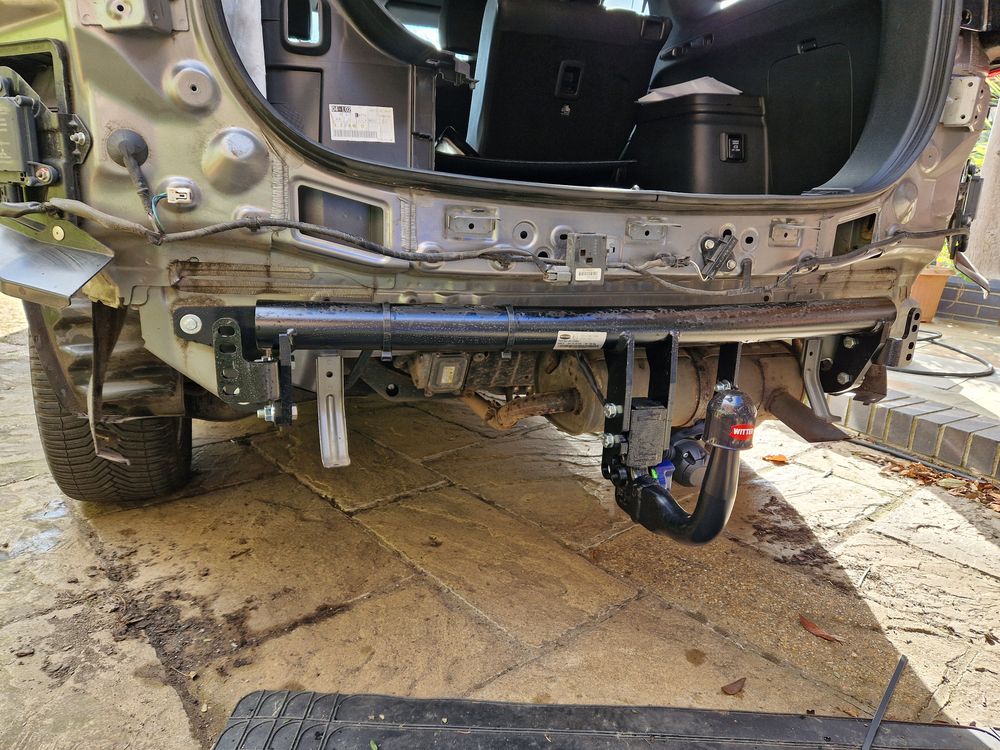
At this point all the metal work is done.
Next up is the electrical installation followed by the bumper re-fitting.
Outlander Towbar Thoughts so far
I really took my time doing this stage and spent more time reading instructions than using any tools. If I had to do it again it is really only a 1 hour job. The removal of the towing eye slowed me down a bit as it wasn’t mentioned in the instructions. Neither was the presence of the battery tray. Disconnecting the bumper light connector was a pain as I really needed two hands to hold the bumper and two to fiddle with the connector. But doing it on my own was quicker than dragging my son off the Xbox.
Read More in Part 2
If you got this far then check out Part 2, Mitsubishi Outlander Towbar Electrics where I fit the electrics kit.
Some of the product links in this post are affiliate links. I receive a small commission based on purchases made via these links. The price you pay is the same.

